

Waterson Door Hinges Installation: Expert Tips, Successful Setup
Adjusting Waterson Closer Hinges is as simple as a standard door hinge installation. Just measure the door, mark the spots with a pencil, drill the holes, and screw them onto the door and frame. For a successful installation, consider the door’s size and weight, and have a screwdriver, drill, hammer, and tape at hand. Here are a few common questions and answers to help you get started.
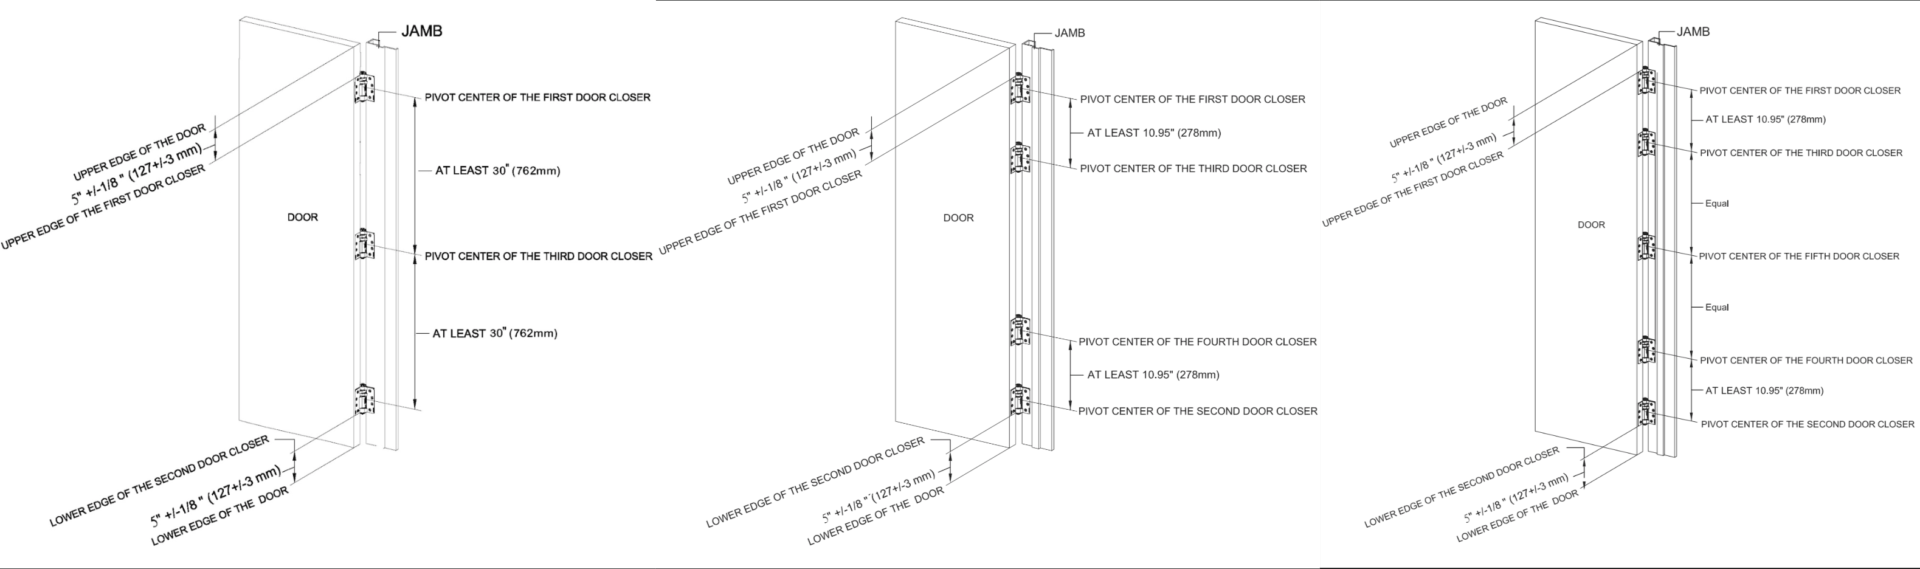
How many self closing hinges per door do you need?
As a general rule you will want to use 1 hinge per every 30 inches of door. That said, different brands provide different closing force, spec and performance.
Regarding door height:
1. Doors up to 60 inches need 2 hinges.
2. Doors over 60 inches, but not over 90 inches, need to use 3 hinges.
3. Doors over 90 inches but not over 120 inches, 4 hinges are recommended.
Door weight is also a factor. For example, Waterson hinges support doors weighing 150- 330lbs with three hinges; 260-440 mainly use four hinges. We recommend that you follow our closer hinge manufacturer’s spec. If your door requires three hinges, then use three self-closing hinges. If your door requires four hinges, then use four self-closing hinges. For more information, please feel free to see our HOW TO ORDER instructions
How to Adjust Waterson Self Closing Hinges
To install Waterson self-closing hinges, here are the preparation nd step by step on how to do it
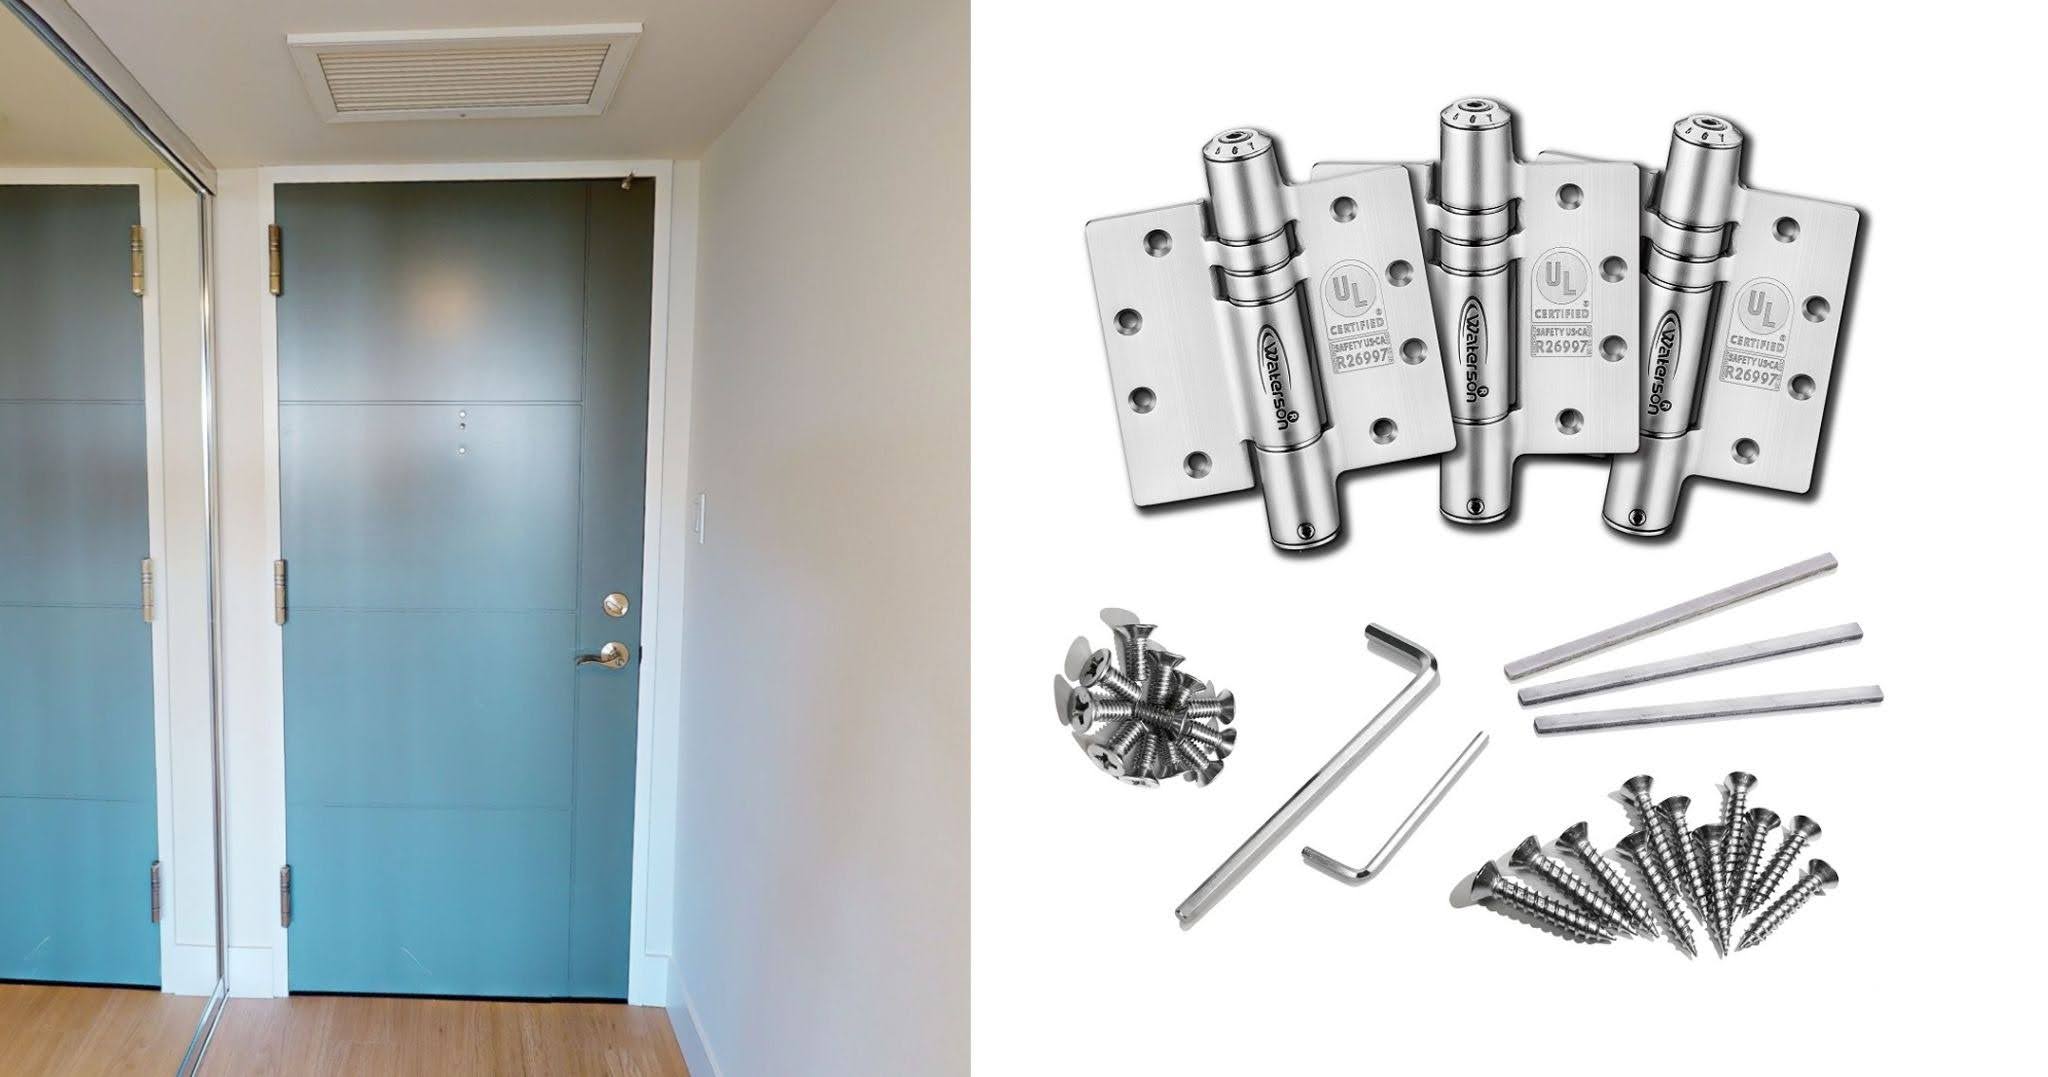
1. What Comes in the Box
Your Waterson package includes everything you need for installation:
- Waterson Closer Hinges
- Standard hex wrench 3mm and 5mm
- Cross head self tapping screws (#12 x 1-1/4″)
- Flat head machine screws (#12-24 UNC, 1/2″)
- Spreader Bar (props the hinge leaves open for easier install)
- Fire-rated stainless steel shims
2. Step-by-Step Installation
Step 1: Replace the middle hinge first Remove the existing middle hinge and replace it with the non-mechanism Waterson hinge using the provided screws. This is the support hinge, it holds the door without any closing function.
Step 2: Install the top hinge (mechanism hinge) Remove the top hinge. Before mounting, adjust the Waterson closer hinge to the 0 setting, then install it in the top position. Starting at 0 makes the next adjustment steps easier to control.
Step 3: Set the starting tension Adjust both the top and bottom hinges to the #3 setting using the hex wrench. This is the recommended starting point before you test anything.
Step 4: Test the closing force Open the door and let it close from three positions: 20 degrees, 60 degrees, and 90 degrees. The door should close fully and latch from all three angles. If it does not, it needs more adjustment.
Step 5: Fine-tune the closing speed Tighten the bottom hinge set screws to adjust door speed. Do the top screw first, then the bottom screw, alternating between them to keep tension even. Go slowly, small turns make a noticeable difference.
Step 6: Final test Test the door one more time at 20, 60, and 90 degrees. If it still does not close consistently in all positions, adjust hinges one at a time, starting from the top hinge and working down.
Can I only use two Waterson hinges on a 7ft door?
For best performance, we advise using three hinges, offering spring tension, swing speed, and latch speed control for a smooth closing. Additionally, three hinges enhance the door set’s longevity. While two Waterson hinges can hold the door, alignment issues might arise due to the larger hinge barrels. Adding a 3rd non-Waterson hinge may affect the aesthetic and alignment, which will not match from an alignment perspective. When installing door or cabinet hinges, trace around the hinge, cut the mortise, and ensure the hinge pin is flush with the edge of the door frame. Learning how to install or replace door hinges will prevent accidental errors, ensuring a top-notch door experience.
Please contact us directly concerning doors over the above specifications.
I have three Waterson hinges. Do they need to be installed in particular locations?
We recommend that you install them based on the stickers affixed to each individual hinge (top, middle, and bottom). This will help you follow our adjustment instructions. That said, changing the order will not greatly affect overall door-closing performance. Once installed, you can adjust the hinges to achieve the desired performance.
What tools do you need for installing Waterson door closer hinges?
Waterson hinges are very easy to install. You simply need the following three items:
- 3mm and 5mm hex wrenches (included)
- Spreader bar (included with double spring (DS) hinge)
- Philips screwdriver
Due to strong spring tension in the DS hinge, we include a customized spreader bar to assist with keeping the hinge open during installation.
Steps to Measure Door/Gates
For the best results, follow the 4 steps shown in the pictures to measure your door or gate accurately. Then, send the measurement details to hinges@waterson.com


What other factors should I consider?
Make sure the door swings freely and easily latch before any hinge speed adjustment.
This is a very important first step for a successful installation. To ensure a successful user experience, please read the adjustment manual before you adjust the closer hinges.