

A gate that sags after installation is one of the most common complaints in the field, and almost every time, the first assumption is that the hinges are the problem.
In most cases, they are not. Sagging comes from what happens before and during installation, not from the hardware itself. So what a sagging gate actually looks like, why it happens, how to diagnose it accurately, and how to fix it without replacing anything. Let’s find out in this article.

What Gate Sagging Actually Looks Like
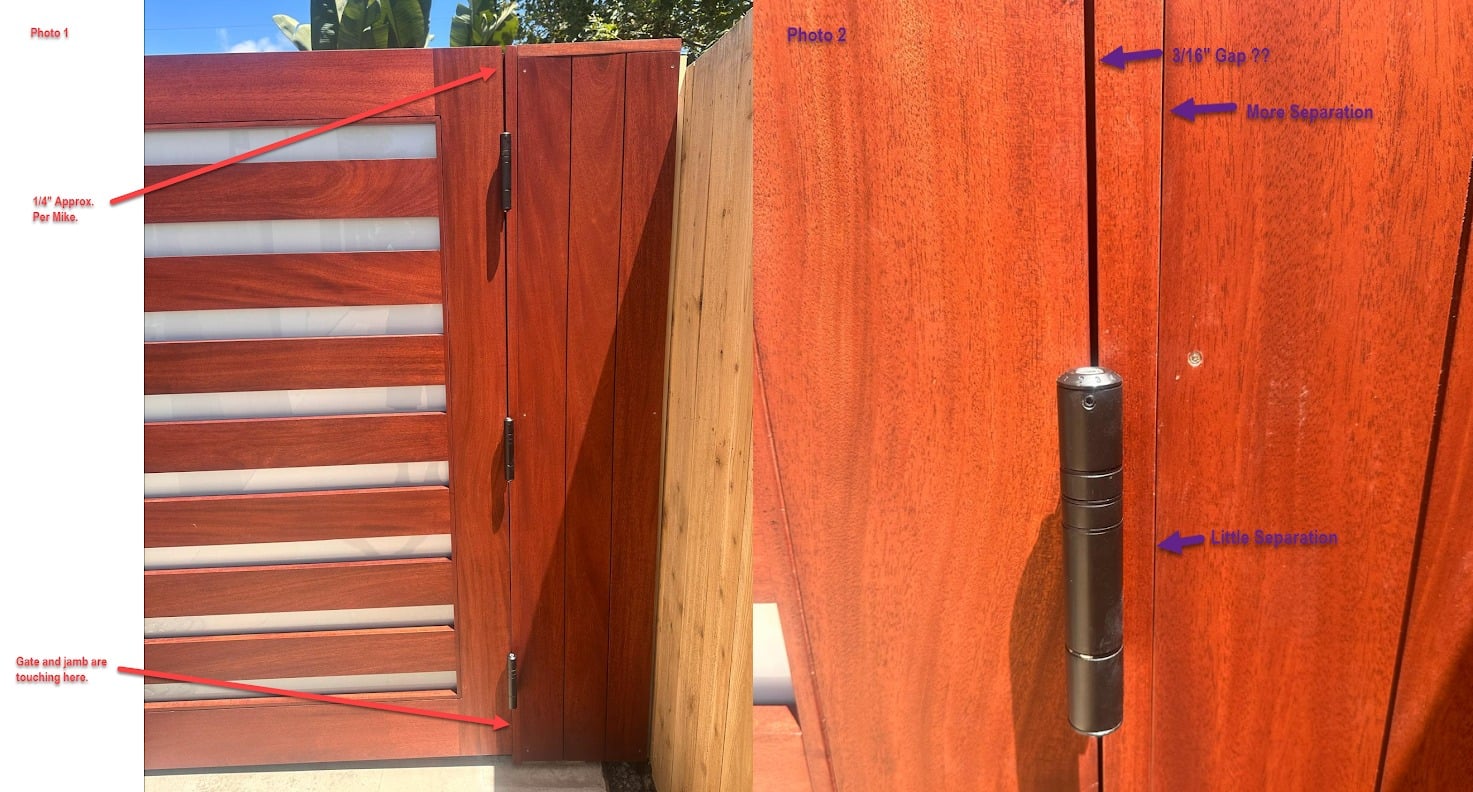
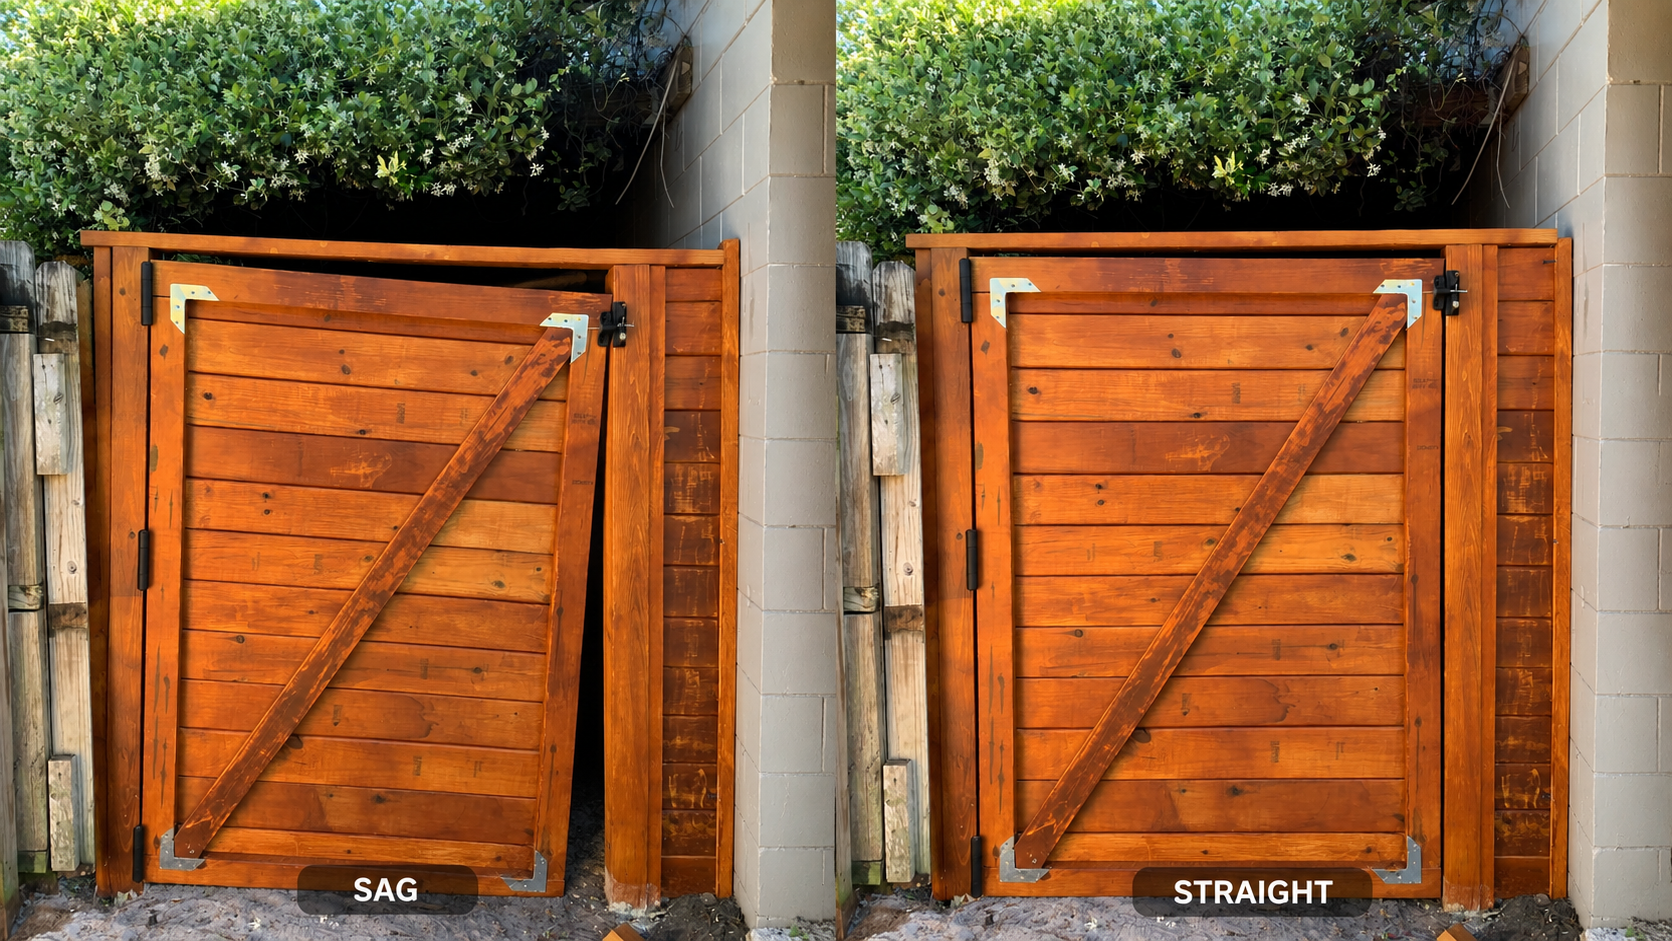
The clearest sign of a sagging gate is uneven gap distribution along the latch side. The gap at the top of the gate is visibly larger than the gap at the bottom. The gate may still open and close, but it sits crooked in the frame and over time will begin to bind, fail to latch, or put uneven stress on the hinge screws.
On a heavy gate, this pattern develops because the latch-side corner drops while the hinge-side stays fixed. The heavier the gate, the faster this progression happens if the root cause is not addressed.
Why It Happens: Two Root Causes
Understanding the source of the sag is the only way to fix it correctly. There are two main reasons a gate sags after installation.
1. Material Deformation
Heavy gates, particularly those made from wood, iron, or composite materials, can shift slightly after fabrication. Temperature changes, moisture absorption, and the weight of the gate itself all create internal stress in the material over time. Even a gate that was perfectly square when it left the shop can develop a slight twist or warp after exposure to outdoor conditions.
When this happens, the gate no longer sits flat against the hinge plane. The bottom corner on the latch side drops, creating the larger-gap-at-top pattern. This is not a hinge failure. The hinges are holding exactly where they were installed. The gate itself has moved.
2. Improper Calibration During Installation
The second cause is more preventable. If the gate is hung without checking for level and plumb at each hinge position before fully tightening the screws, small misalignments get locked in permanently. On a 190 lb gate, even a 1 to 2 mm misalignment at the top hinge translates into a visible gap difference by the time you reach the latch edge.
This is why the screw sequence during installation matters. Locating the screws loosely first, confirming the gate is level and not sagging, and only then tightening fully is the correct order. Tightening immediately without checking position is the single most common installation mistake on heavy gates.
How to Fix the Gate Sagging: Metal Door Shims
The fix for most sagging gates is shimming, specifically at the top hinge. Waterson gate hinges include stainless steel shims in the package for exactly this reason. Shims are thin plates placed between the hinge leaf and the gate or frame surface to push the hinge position out slightly, correcting the angle and bringing the gate back into alignment.
The process:
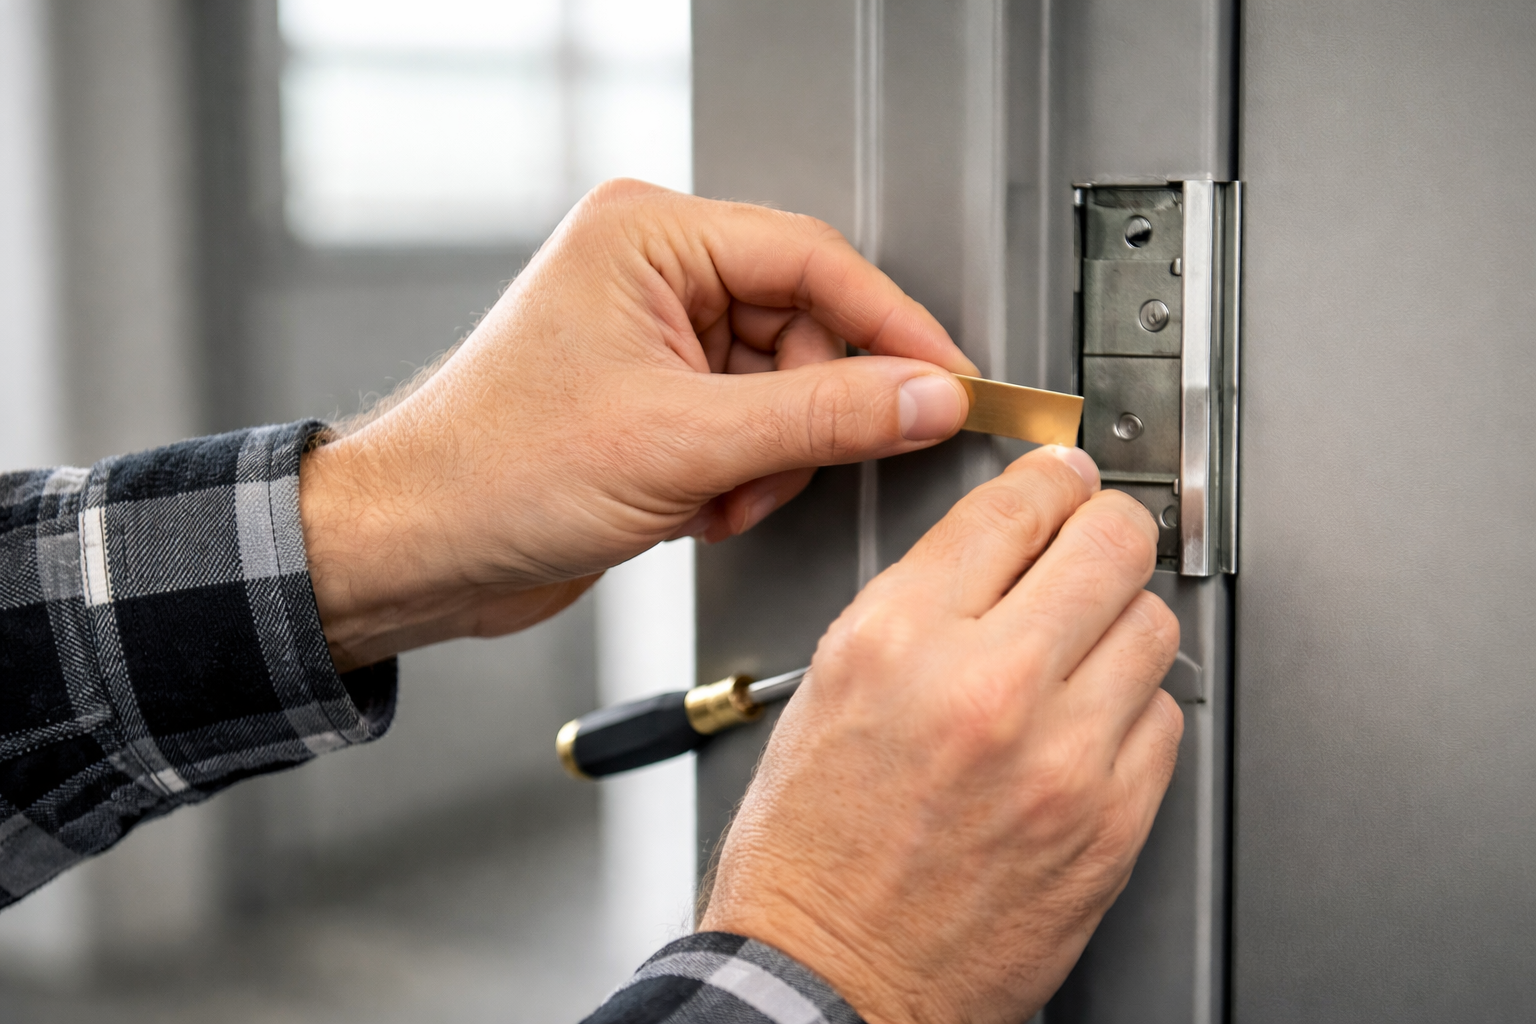
- Loosen (do not fully remove) the screws on the top hinge, gate side
- Insert a shim between the hinge leaf and the gate surface
- Re-run the credit card check along the latch edge
- Add or remove shim thickness until the gap is even top to bottom
- Retighten all screws fully
![]()
In most cases a single shim at the top hinge is enough. If the sagging is significant, a second shim at the middle hinge may also help. Avoid shimming the bottom hinge first, as this tends to overcorrect in the wrong direction.
Shims are available separately if the originals have been misplaced.
About Waterson Stainless Steel Metal Door Shims
Not all shims are the same, and for commercial and fire-rated gate applications, the material matters. Waterson stainless steel metal door shims are 304 stainless steel, UL fire-rated for 3-hour assemblies, and fully compliant with NFPA 80 Section 6.4.3.4, which mandates stainless steel specifically for fire-rated door and gate assemblies. Plastic or aluminum shims do not meet this standard.
| Feature | Specification |
|---|---|
| Material | 304 Stainless Steel |
| Fire Rating | UL Listed, 3-hour fire-rated assemblies |
| Compliance | NFPA 80 Section 6.4.3.4 |
| Dimensions | 3.543″ x 0.177″ |
| Thickness Options | .040 to .060 inches |
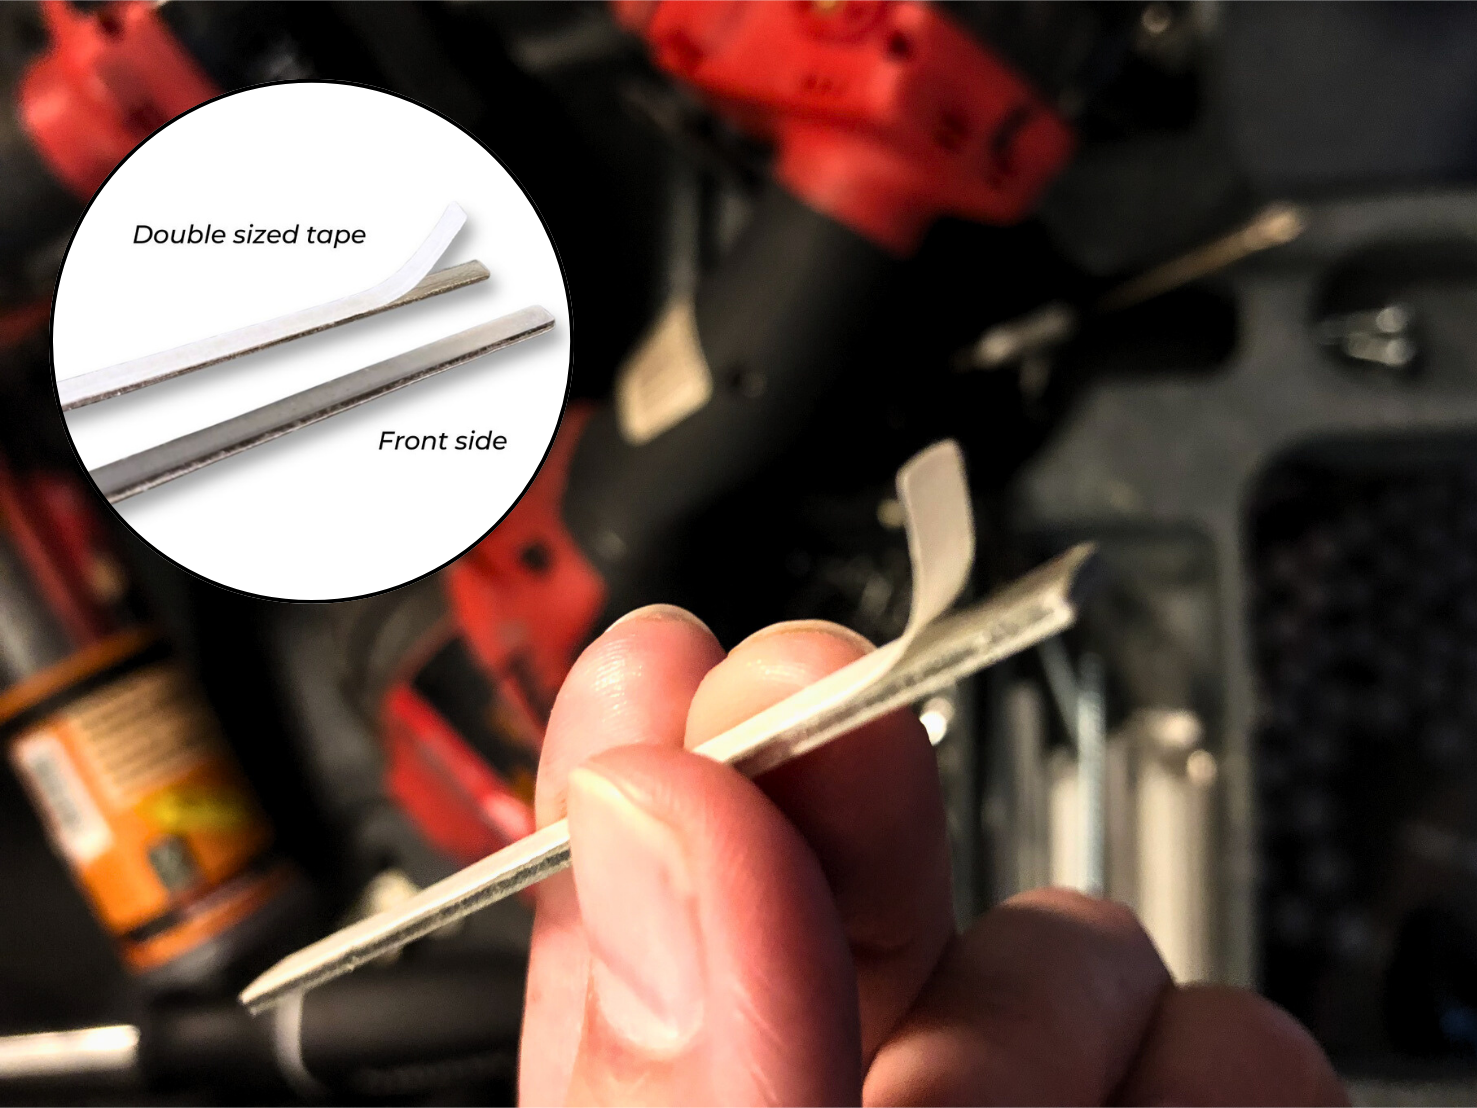
| Backing | Adhesive-backed on one side |
| Stackable | Yes, stackable and removable for readjustment |
Each shim measures 3.543″ x 0.177″ with thickness options from .040 to .060 inches. They are adhesive-backed on one side, which keeps the shim in place during installation and prevents slipping while you drive the screws. They are also stackable if more correction is needed, and removable if you need to readjust. For gates that are not fire-rated, the same shims work equally well. The stainless steel construction resists rust and corrosion on exterior installations, which is where most heavy gates live.
How to Prevent the Sagging During Installation
The most reliable way to keep a gate from sagging is to catch the problem before the screws are fully tightened. Here is the sequence that works on heavy gates:
- Attach all hinge leaves to the gate first, with the gate lying flat or supported in a jig
- Hang the gate and locate the top and bottom frame screws loosely
- Run the credit card check before tightening anything
- Adjust position until the gap is even
- Tighten top and bottom screws, then middle hinges
- Run the credit card check one final time after full tightening
On gates above 150 lbs, a gate hanging jack makes this significantly easier. Holding a heavy gate in position by hand while simultaneously checking alignment and driving screws is how misalignments get locked in.
If the Gate Is Still Sagging After Shimming
If shimming does not resolve the issue, the next step is to check whether the frame itself is plumb. A frame that has shifted or was installed out of plumb will make any gate hung on it appear to sag regardless of how well the hinges are set. Use a level on the hinge-side post before concluding the gate or hinges are the source of the problem.
For gates that have developed a significant twist or warp in the material itself, shimming alone may not be enough. In these cases, the gate may need to be refabricated or reinforced before rehinging.

Client Success: Waterson Shims in Action
A client from Isenhour Door Product approached Waterson for steel door shims compliant with fire-rated standards. Impressed by the quality of Waterson’s hinges and shims, they couldn’t find a comparable product elsewhere. After some research, they referred to Waterson’s products and ended up with 1000 door shims. The feedback has been overwhelmingly positive since the shim’s design was so convenient to install.
So what’s holding you back? Elevate your projects with Waterson Metal Door Shims now!
Request For Bulky Quote
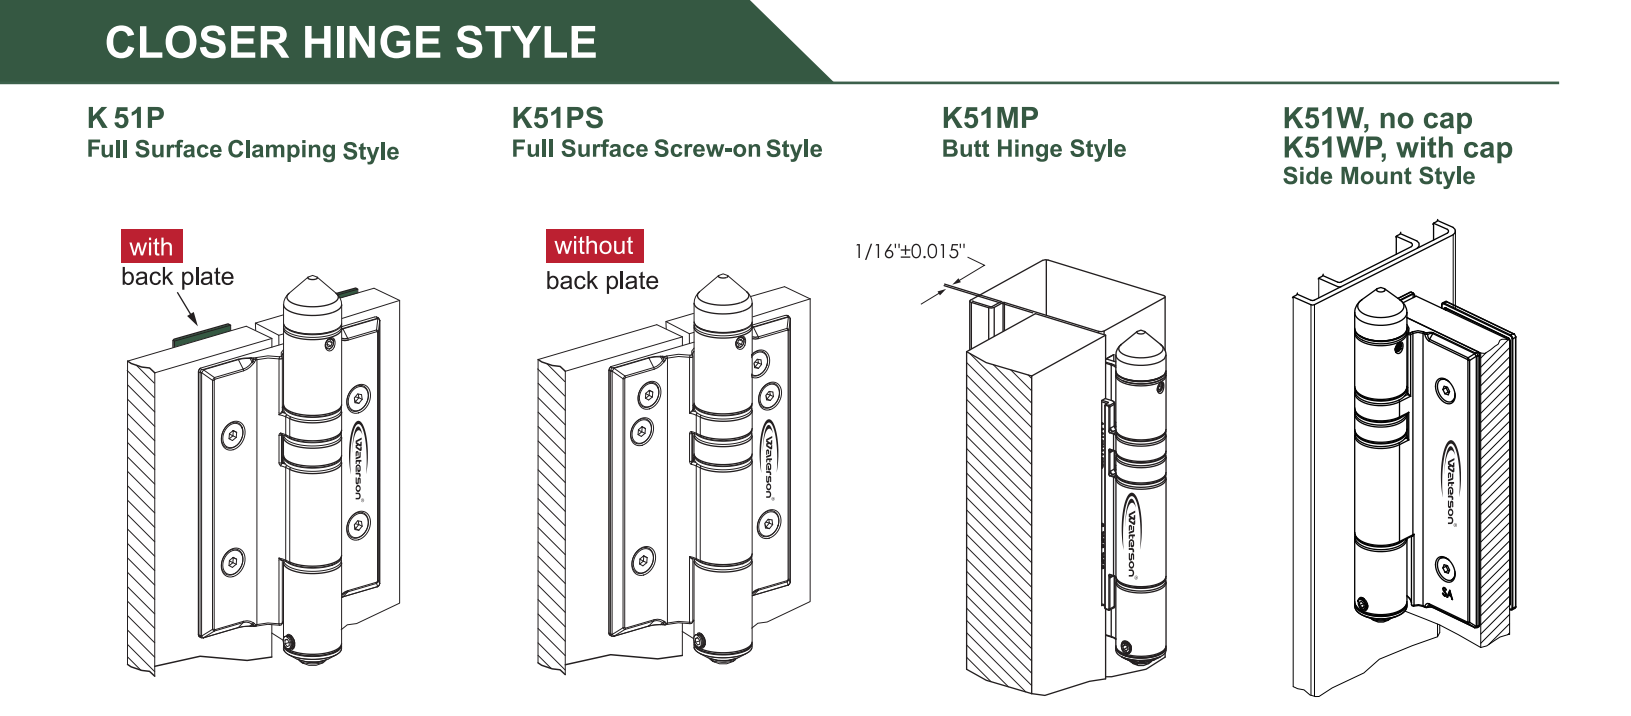
Please note that Waterson Closer Hinges start from a size of 4″x4″. If you’re in need of smaller self-closing hinges, we’d recommend checking out some other resources! Also, we only provide single acting closer hinges. Thank you.
Recent Post
Assisted Living Door Requirement: Fire Rating, ADA, and Self-Closing Hinges Explained
"We manage a 40-unit assisted living community. The fire marshal wants every unit entry door to close and latch on its own, but several of [...]
Different Types of Gate Hinges Explanation: A Focus on Self Closing Solutions
Quick Answer Heavy duty gate hinges come in three main styles: half surface hinges, best for half doors up to 150lbs with ADA compliant vertical [...]
Stainless Steel Spring Hinge that Meets Your Needs
Quick Answer Stainless steel spring hinges combine a hinge and door closer into one self closing unit, essential for fire safety, security, and convenience. Waterson [...]